Optimizing User Experience with iTerm 2’s Shell Integration

Introduction⌗
Although I’ve been using iTerm 2 for some time with the Status bar enabled, I noticed that when I SSH into remote servers, information like Host, User, Current Path, etc., doesn’t update accordingly.
I initially thought this feature could only retrieve information from the local shell, which made me question the usefulness of displaying Host information. So I searched on Google to confirm my suspicion. That’s when I discovered iTerm 2’s Shell Integration, which is designed to solve this exact problem and offers additional user-friendly features.
Installation⌗
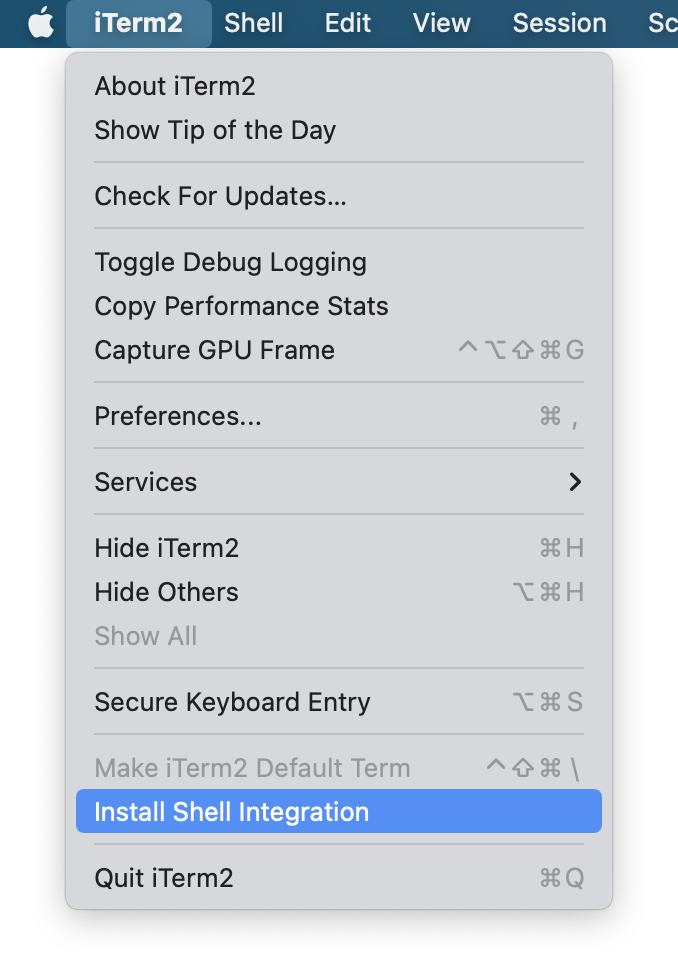
You can follow the official documentation for installation, or you can click on Install Shell Integration in the iTerm 2 menu:
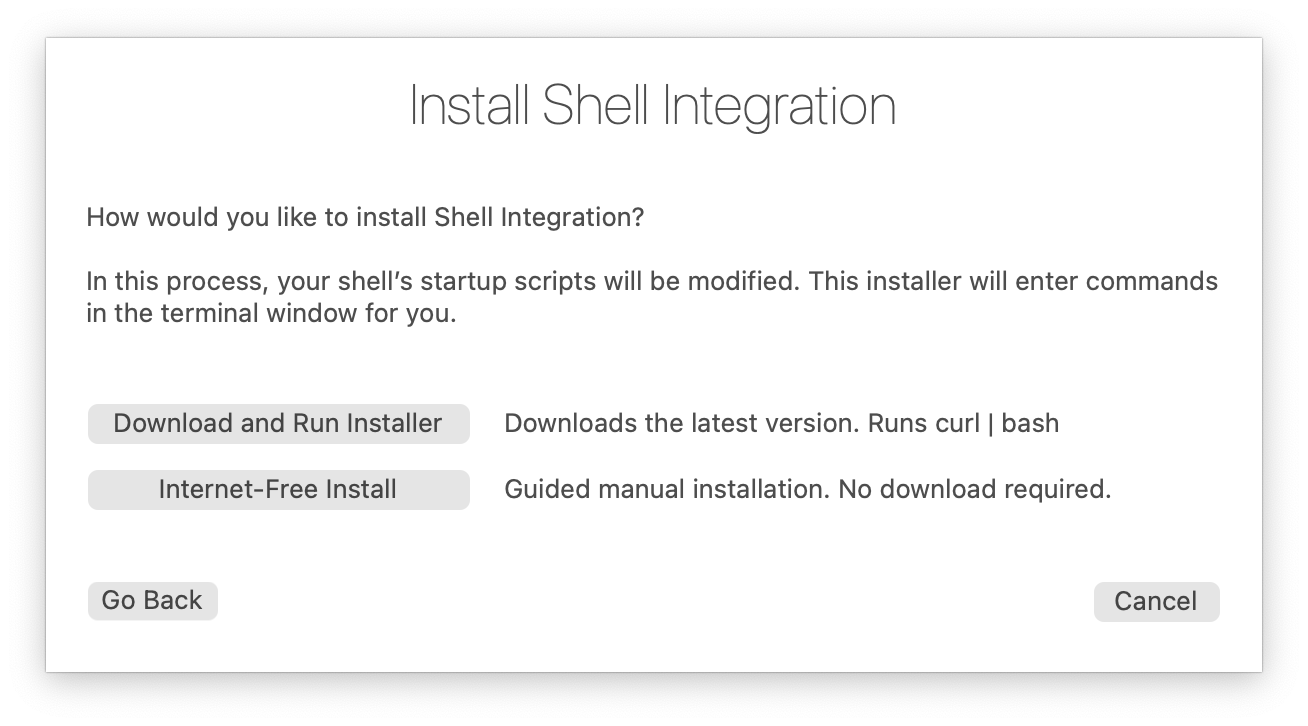
This will open an installation prompt window. Keep the Also install iTerm2 Utilities option checked by default, then click Continue.

Click Download and Run Installer to begin the automatic installation:
iTerm 2 will execute the following command in the current window:
curl -L https://iterm2.com/shell_integration/install_shell_integration_and_utilities.sh | bash
  % Total    % Received % Xferd  Average Speed   Time    Time     Time  Current
                                 Dload  Upload   Total   Spent    Left  Speed
100  5255  100  5255    0     0   8523      0 --:--:-- --:--:-- --:--:--  8530
Downloading script from https://iterm2.com/shell_integration/zsh and saving it to /root/.iterm2_shell_integration.zsh...
Checking if /root/.zshrc contains iterm2_shell_integration...
Appending source command to /root/.zshrc...
Downloading imgcat...
Downloading imgls...
Downloading it2api...
Downloading it2attention...
Downloading it2check...
Downloading it2copy...
Downloading it2dl...
Downloading it2getvar...
Downloading it2git...
Downloading it2setcolor...
Downloading it2setkeylabel...
Downloading it2tip...
Downloading it2ul...
Downloading it2universion...
Downloading it2profile...
Adding aliases...

--------------------------------------------------------------------------------

Done.
iTerm2 shell integration was installed!

A script was installed to /root/.iterm2_shell_integration.zsh
Utilities were installed to /root/.iterm2. You don't need to modify your PATH because /root/.iterm2_shell_integration.zsh includes aliases for them.

To make it work right now, do:
  source /root/.iterm2_shell_integration.zsh

This line was also added to /root/.zshrc, so the next time you log in it will be loaded automatically.

--------------------------------------------------------------------------------

You will also have these commands:
imgcat filename
  Displays the image inline.
imgls
  Shows a directory listing with image thumbnails.
it2api
  Command-line utility to manipulate iTerm2.
it2attention start|stop|fireworks
  Gets your attention.
it2check
  Checks if the terminal is iTerm2.
it2copy [filename]
  Copies to the pasteboard.
it2dl filename
  Downloads the specified file, saving it in your Downloads folder.
it2setcolor ...
  Changes individual color settings or loads a color preset.
it2setkeylabel ...
  Changes Touch Bar function key labels.
it2tip
  iTerm2 usage tips
it2ul
  Uploads a file.
it2universion
  Sets the current unicode version.
it2profile
  Change iTerm2 session profile on the fly.
Note that you need to install this on every system you plan to access via iTerm 2. For example, if I’ve installed it on my macOS, I also need to install it on remote servers. Otherwise, when using SSH to switch between different servers, information like Host, User, Current path, etc., won’t sync. Upload and download features won’t work either!
Other Features⌗
Downloading Files from Remote Servers⌗
Files or directories listed using the ls command on a remote server can be downloaded to your local machine by right-clicking on the file and clicking the Download with scp from XXX button.
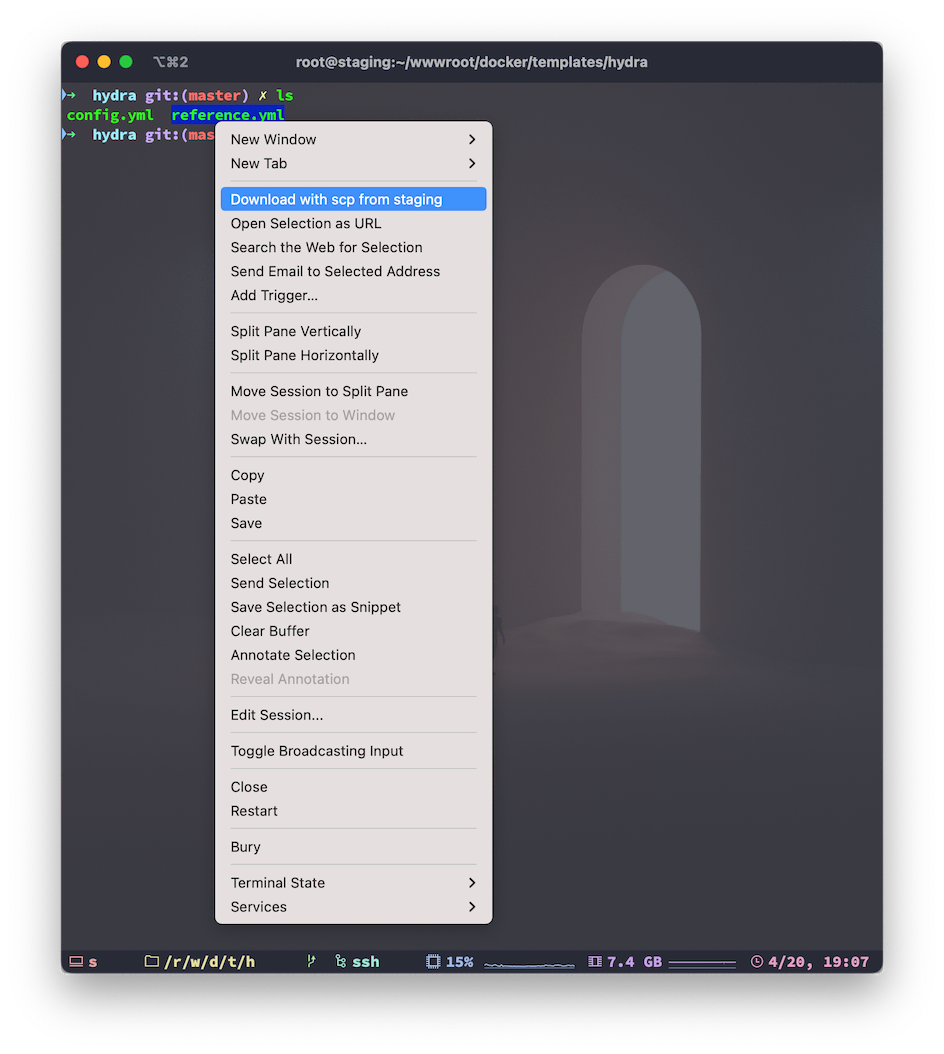
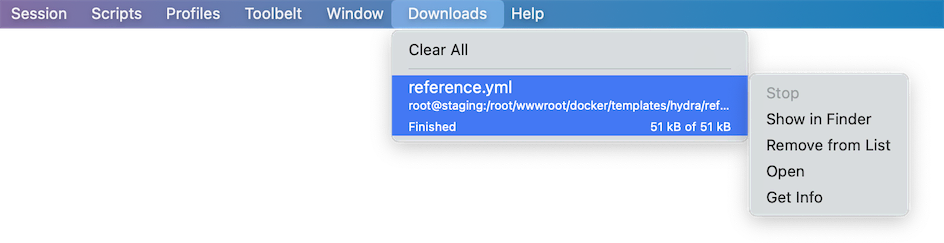
Download tasks can be viewed and managed in the Download menu of iTerm 2:
I noticed that when using the
ls -lacommand to list files, right-clicking doesn’t activate theDownload with scp from XXXbutton. It only works with thelscommand, and I’m not sure why.
Uploading Files to Remote Servers⌗
If you’ve configured authentication information for remote servers in ~/.ssh/config, after SSH-ing to a remote server, hold the Option key and drag files into the iTerm 2 window to upload them using scp. Remember to cd to your desired upload directory first!
Besides uploading and downloading, there are other features like remote command history, recently visited directories, Toolbelt, and more… You can explore these by referring to the official documentation!
Note: Shell Integration doesn’t support tmux, screen, or similar modes.
I hope this is helpful, Happy hacking…