Using MongoShake for MongoDB Data Synchronization

Requirement⌗
Our team needs to synchronize data from our China MongoDB database to a database in Japan, as services in China generate data, while the business in Japan uses this data for analysis. In some cases, we may also need to synchronize data modified in Japan back to the domestic database.
After researching all MongoDB database synchronization tools available in the market, currently only MongoShake meets our requirements.
Introduction⌗
MongoShake is an open-source MongoDB data synchronization project implemented by Alibaba based on Go. It’s a cluster replication tool based on MongoDB oplog that can meet migration and synchronization needs, further implementing disaster recovery and multi-active functionality. It has been widely used in MongoDB cloud databases, but many features are only available for Alibaba Cloud’s MongoDB databases and not for self-built databases using the open-source version. This is because Alibaba Cloud has modified the MongoDB core.
MongoShake supports various methods for data synchronization, including RPC, TCP, File, Kafka, custom API, and Direct. We mainly use the Direct method for synchronization, obtaining the oplog from the source and then writing directly to the corresponding namespace in the target database.
MongoShake supports synchronization modes: full plus incremental, full, and incremental. You can modify the configuration file to implement different synchronization modes (there are some pitfalls in mode selection that will be discussed later).
It also supports blacklist and whitelist settings to exclude certain databases or collections that don’t need synchronization, or to only synchronize specified databases or collections.
Installation⌗
Visit the MongoShake Release page to download the compiled executable program.
After extraction, you will get the following files:
tar -zxvf mongo-shake-v2.6.5.tar.gz

x mongo-shake-v2.6.5/
x mongo-shake-v2.6.5/receiver.linux
x mongo-shake-v2.6.5/mongoshake-stat
x mongo-shake-v2.6.5/receiver.darwin
x mongo-shake-v2.6.5/collector.linux
x mongo-shake-v2.6.5/comparison.py
x mongo-shake-v2.6.5/receiver.conf
x mongo-shake-v2.6.5/stop.sh
x mongo-shake-v2.6.5/collector.windows
x mongo-shake-v2.6.5/collector.conf
x mongo-shake-v2.6.5/receiver.windows
x mongo-shake-v2.6.5/collector.darwin
x mongo-shake-v2.6.5/start.sh
x mongo-shake-v2.6.5/hypervisor
Configuration⌗
Edit the collector.conf file, mainly modifying the following configuration items:
sync_mode⌗
Used to configure the synchronization method. As mentioned earlier, there are three synchronization modes. If the target database is new and requires full synchronization for the first time, you can choose all or full.
The difference between the two is that all will first perform full synchronization and then automatically switch to incremental synchronization after completion. There’s a pitfall here: the configuration file always shows all, but if the MongoShake process exits for some reason and you manually restart it, remember to change the synchronization mode to incremental mode, i.e., incr.
If you choose full instead of all mode for full synchronization, the process will automatically exit after the first full synchronization is complete. Before starting the process, remember to change the synchronization mode to incremental mode, i.e., incr.
Otherwise, when restarted, it will delete the data in the target database and perform full synchronization again.
mongo_urls⌗
The connection address of the source database, such as:
mongodb://username:[email protected]:20040,127.0.0.1:20041.
tunnel⌗
The method of synchronizing data. Here we use the simplest direct synchronization to the target database—direct.
tunnel.address⌗
Configure the address of the target database here, such as:
mongodb://username:[email protected]:20040,127.0.0.1:20041.
incr_sync.oplog.gids⌗
If it’s bidirectional synchronization and both ends are Alibaba Cloud’s MongoDB services, you can apply to Alibaba Cloud to enable GID to prevent circular replication.
After enabling, you will see a gid in the Alibaba Cloud MongoDB oplog that marks the source.

checkpoint.storage.url⌗
Configure the database connection used to save synchronization position information. If not set, a database and collection will be created in the source database by default.
checkpoint.storage.db⌗
Configure the database name for storing checkpoint data, default is mongoshake.
checkpoint.storage.collection⌗
Configure the collection name for storing checkpoint data, default is ckpt_default. By checking the data in this collection, you can know which time point the Oplog has synchronized to, avoiding a large accumulation of Oplog or being overwritten, causing data to be unsynchronized or lost!
checkpoint.start_position⌗
This configuration is used to set the time point for reading the source database Oplog. If a time point is configured that is not 1970-01-01T00:00:00Z and cannot be found in the source database’s Oplog, the synchronization service will fail to start! This parameter is extremely important, especially when the synchronization service stops due to a failure and needs to be restarted.
An example:⌗
Recently, due to the growth in traffic, our company’s database disk space has become tight. So we considered deleting some old access data (this is also a pitfall). If you delete data before a certain time period, this method can only be executed one by one, and if there is a large amount of data, it will generate a large amount of Oplog.
One of our nodes had this issue, causing a large amount of Oplog to be generated in a short time. Since the Oplog space is 5% of the total disk size, the Oplog was overwritten, and when the synchronization service tried to read the Oplog but couldn’t find it, an error occurred and the service couldn’t run normally.
Another point is that when we tried to restart the synchronization service, we didn’t modify the sync_mode in the configuration file to incr. This ultimately led to the production target database being deleted.
Fortunately, our database had snapshots, and the time interval wasn’t too long.
Summary⌗
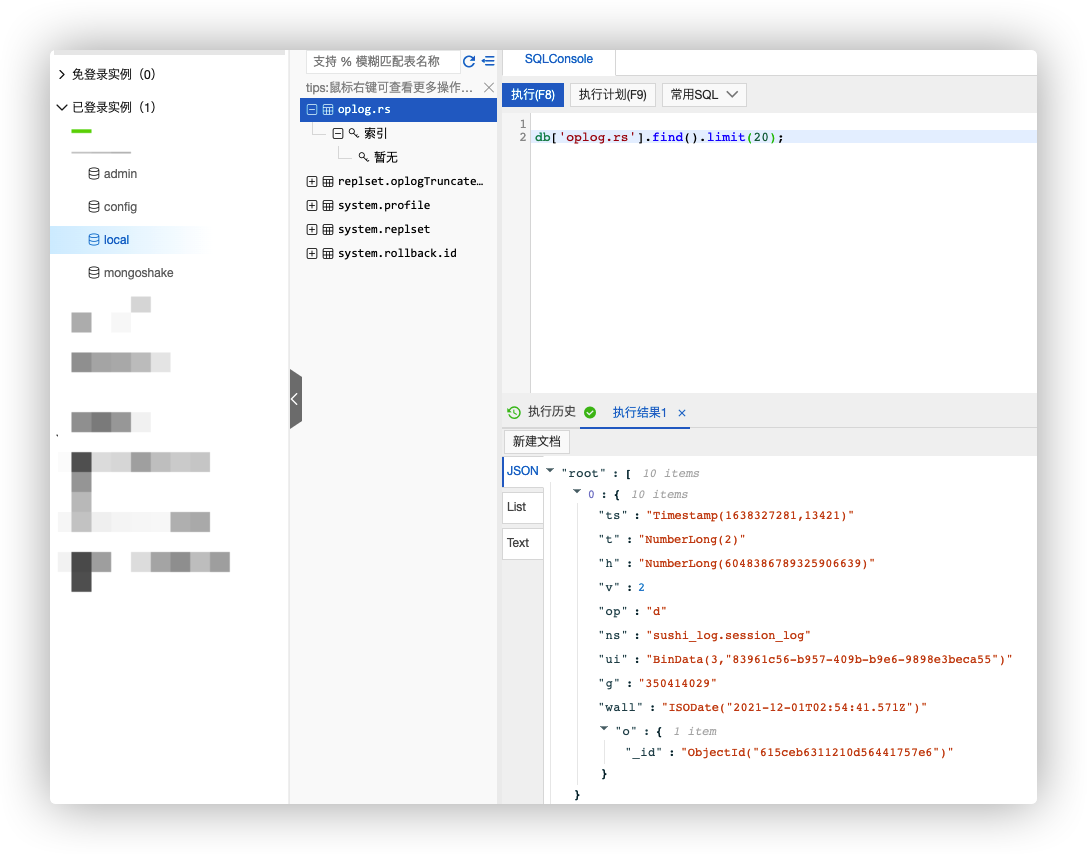
If MongoShake stops for some reason, before starting it again, remember to check the synchronization mode to avoid the target database being deleted. Then, if startup fails, you can access Alibaba Cloud’s database management backend to check the time of the earliest oplog entry, which is the ts field in the screenshot above, convert that timestamp to UTC timezone time, and modify the value of the checkpoint.start_position configuration item to that time point.
I hope this is helpful, Happy hacking…