使用 Step-CA 搭建私有 ACME Server

前言⌗
我们的业务经常需要再过个项目中为一个资源生成一个 URL,而因为环境的一致性问题,在生成 URL 时,经常出现在本地开发环境生成的是 HTTPS 协议下的 URL。
在生产环境,我们使用的是按年购买的证书,部署到云端 SLB 上去,在测试环境本来都统一是 HTTP 协议,也正是这个时候,很多问题在测试环境测不出来,但是发到生产环境后却暴露出来了。后来改造成了采用 Let’s Encrypt 颁发的免费证书!
现在依然有一个问题就是团队的成员在本地开发环境每个人用的域名不同,协议不同,这导致沟通成本的增加。
现在我们要做的是使用一套 Docker 环境尽可能的模拟出生产环境!
方案调研⌗
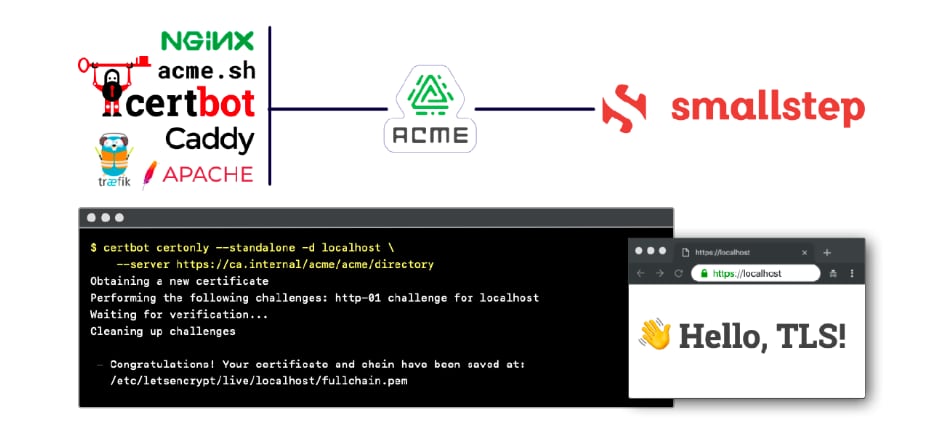
经过调研发现,开源的 CA 项目有如下:
经过初步了解和上手体验,发现 Step Certificates 的文档最全面,用户体验相对较好,只是上手有一定难度,需要对 X.509 有一定的了解。
安装⌗
建议在开始直接可以先通篇阅读官方文档,形成知识框架。然后在结合官方的 Blog: Run your own private CA & ACME server using step-ca,进行操作!
Docker⌗
我们如果要用于团队内部的基础开发环境搭建,必然要在容器中进行使用:
services:
  step-ca:
    image: smallstep/step-ca:latest
    labels:
      - traefik.enable=false
    restart: always
    volumes:
      - step-ca:/home/step
    hostname: step-ca
    networks:
      traefik:
        ipv4_address: 10.8.10.254
    extra_hosts:
      - ca.svc.dev:127.0.0.1
    environment:
      - TZ=Asia/Shanghai
      - DOCKER_STEPCA_INIT_NAME=Smallstep
      - DOCKER_STEPCA_INIT_ACME=true
      - DOCKER_STEPCA_INIT_ADDRESS=0.0.0.0:443
      - DOCKER_STEPCA_INIT_PASSWORD=ECkFB7TwcHVPuLhOtKwCIP3J3pNGHarF
      - DOCKER_STEPCA_INIT_DNS_NAMES=ca.svc.dev,acme-v02.api.letsencrypt.org,step-ca
      - [email protected]
      - DOCKER_STEPCA_INIT_REMOTE_MANAGEMENT=true
    container_name: step-ca

volumes:
  step-ca:
    name: step-ca

networks:
  traefik:
    external: true
配置说明:
- 12 行:为容器设置一个固定 IP,这样便于其他服务的请求
- 14 行:为 HTTPS 的域名做本地映射,避免容器的自检失败
目前发现,虽然在环境变量中配置了
DOCKER_STEPCA_INIT_ACME为true,但是依然无法自动注册 ACME 的 Provider,当服务起来后,我们需要修改容器挂载卷中的配置文件!
docker compose up -d
docker compose logs
step-ca  | Generating root certificate... done!
step-ca  | Generating intermediate certificate... done!
step-ca  |
step-ca  | ✔ Root certificate: /home/step/certs/root_ca.crt
step-ca  | ✔ Root private key: /home/step/secrets/root_ca_key
step-ca  | ✔ Root fingerprint: ab8462fc8e67c581626e829a18f5a801b5eea15baf07ee943a6f2bfa24ee8e40
step-ca  | ✔ Intermediate certificate: /home/step/certs/intermediate_ca.crt
step-ca  | ✔ Intermediate private key: /home/step/secrets/intermediate_ca_key
step-ca  | badger 2024/07/16 06:37:16 INFO: All 0 tables opened in 0s
step-ca  | badger 2024/07/16 06:37:16 INFO: Storing value log head: {Fid:0 Len:30 Offset:3321}
step-ca  | badger 2024/07/16 06:37:16 INFO: [Compactor: 173] Running compaction: {level:0 score:1.73 dropPrefixes:[]} for level: 0
step-ca  | badger 2024/07/16 06:37:16 INFO: LOG Compact 0->1, del 1 tables, add 1 tables, took 5.842993ms
step-ca  | badger 2024/07/16 06:37:16 INFO: [Compactor: 173] Compaction for level: 0 DONE
step-ca  | badger 2024/07/16 06:37:16 INFO: Force compaction on level 0 done
step-ca  | ✔ Database folder: /home/step/db
step-ca  | ✔ Default configuration: /home/step/config/defaults.json
step-ca  | ✔ Certificate Authority configuration: /home/step/config/ca.json
step-ca  | ✔ Admin provisioner: admin (JWK)
step-ca  | ✔ Super admin subject: [email protected]
step-ca  |
step-ca  | Your PKI is ready to go. To generate certificates for individual services see 'step help ca'.
step-ca  |
step-ca  | FEEDBACK 😍 🍻
step-ca  |   The step utility is not instrumented for usage statistics. It does not phone
step-ca  |   home. But your feedback is extremely valuable. Any information you can provide
step-ca  |   regarding how you’re using `step` helps. Please send us a sentence or two,
step-ca  |   good or bad at [email protected] or join GitHub Discussions
step-ca  |   https://github.com/smallstep/certificates/discussions and our Discord
step-ca  |   https://u.step.sm/discord.
step-ca  |
step-ca  | 👉 Your CA administrative username is: [email protected]
step-ca  | 👉 Your CA administrative password is: ECkFB7TwcHVPuLhOtKwCIP3J3pNGHarF
step-ca  | 🤫 This will only be displayed once.
step-ca  | badger 2024/07/16 06:37:16 INFO: All 1 tables opened in 1ms
step-ca  | badger 2024/07/16 06:37:16 INFO: Replaying file id: 0 at offset: 3351
step-ca  | badger 2024/07/16 06:37:16 INFO: Replay took: 1.708µs
step-ca  | 2024/07/16 06:37:16 Building new tls configuration using step-ca x509 Signer Interface
step-ca  | 2024/07/16 06:37:16 Starting Smallstep CA/0.27.1 (linux/arm64)
step-ca  | 2024/07/16 06:37:16 Documentation: https://u.step.sm/docs/ca
step-ca  | 2024/07/16 06:37:16 Community Discord: https://u.step.sm/discord
step-ca  | 2024/07/16 06:37:16 Config file: /home/step/config/ca.json
step-ca  | 2024/07/16 06:37:16 The primary server URL is https://ca.svc.dev:443
step-ca  | 2024/07/16 06:37:16 Root certificates are available at https://ca.svc.dev:443/roots.pem
step-ca  | 2024/07/16 06:37:16 Additional configured hostnames: acme-v02.api.letsencrypt.org, step-ca
step-ca  | 2024/07/16 06:37:16 X.509 Root Fingerprint: ab8462fc8e67c581626e829a18f5a801b5eea15baf07ee943a6f2bfa24ee8e40
step-ca  | 2024/07/16 06:37:16 Serving HTTPS on 0.0.0.0:443 ...
配置⌗
当容器启动后,Smallstep 会生成对应的配置:
tree
.
├── certs
│   ├── intermediate_ca.crt
│   └── root_ca.crt
├── config
│   ├── ca.json
│   └── defaults.json
├── db
│   ├── 000000.vlog
│   ├── 000030.sst
│   ├── KEYREGISTRY
│   └── MANIFEST
├── secrets
│   ├── intermediate_ca_key
│   ├── password
│   └── root_ca_key
└── templates

6 directories, 11 files
这其中最常用到的就是 certs/root_ca.crt 和 config/ca.json。下面是 config/ca.json 的配置:
{
  "root": "/home/step/certs/root_ca.crt",
  "federatedRoots": null,
  "crt": "/home/step/certs/intermediate_ca.crt",
  "key": "/home/step/secrets/intermediate_ca_key",
  "address": "0.0.0.0:443",
  "insecureAddress": "",
  "dnsNames": [
    "ca.svc.dev",
    "acme-v02.api.letsencrypt.org",
    "step-ca"
  ],
  "logger": {
    "format": "text"
  },
  "db": {
    "type": "badgerv2",
    "dataSource": "/home/step/db",
    "badgerFileLoadingMode": ""
  },
  "authority": {
    "claims": {
      "disableRenewal": false,
      "minTLSCertDuration": "2160h",
      "maxTLSCertDuration": "2160h",
      "defaultTLSCertDuration": "2160h",
      "allowRenewalAfterExpiry": false,
      "minHostSSHCertDuration": "5m",
      "maxHostSSHCertDuration": "1680h",
      "minUserSSHCertDuration": "5m",
      "maxUserSSHCertDuration": "24h",
      "defaultUserSSHCertDuration": "16h",
      "defaultHostSSHCertDuration": "720h"
    },
    "enableAdmin": true,
    "provisioners": [
      {
        "type": "ACME",
        "name": "acme"
      }
    ]
  },
  "tls": {
    "cipherSuites": [
      "TLS_ECDHE_ECDSA_WITH_CHACHA20_POLY1305_SHA256",
      "TLS_ECDHE_ECDSA_WITH_AES_128_GCM_SHA256"
    ],
    "minVersion": 1.2,
    "maxVersion": 1.3,
    "renegotiation": false
  }
}
配置说明:
- 22~24 行的
claims部分是手动增加的配置,主要是配置证书的有效时长等 - 36~41 行的
provisioners部分用于开启 ACME 相关配置
这里有一点需要注意,官方的 Blog 中说要将
minTLSCertDuration和maxTLSCertDuration,配置在ACMEProvider 当中,实际测试下来,并不生效!
配置修改好以后,重启容器即可!
宿主机⌗
要想在宿主机中使用 CA,则需要将 CA 的根证书添加到系统的信任证书列表中。在 macOS 中,可以使用如下命令来安装 Smallstep:
brew install step
step certificate install <ROOT_CA_PATH>
将 <ROOT_CA_PATH> 部分替换为你容器卷中
root_ca.crt证书的文件路径,然后执行安装!
安装成功后,系统就能够信任所有由 Smallstep 签发的证书了!
手动生成证书⌗
docker compose exec step-ca step ca certificate localhost certs/localhost.crt certs/localhost.key
✔ Provisioner: acme (ACME)
Using Standalone Mode HTTP challenge to validate localhost . done!
Waiting for Order to be 'ready' for finalization .. done!
Finalizing Order .. done!
✔ Certificate: certs/localhost.crt
✔ Private Key: certs/localhost.key
命令执行后,会提示你选择一个 Provider,这里就选 ACME。
生成的证书文件在 step-ca 卷中的 certs 目录中,可以将证书拷贝到宿主机中,然后用 step CLI 进行验证:
step certificate inspect localhost.crt
Certificate:
    Data:
        Version: 3 (0x2)
        Serial Number: 208228708681982736082256753293896422484 (0x9ca763f9fb606e7dfb51d17c15a39454)
    Signature Algorithm: ECDSA-SHA256
        Issuer: O=Smallstep,CN=Smallstep Intermediate CA
        Validity
            Not Before: Jul 18 01:54:16 2024 UTC
            Not After : Oct 16 01:55:16 2024 UTC
        Subject: CN=localhost
        Subject Public Key Info:
            Public Key Algorithm: ECDSA
                Public-Key: (256 bit)
                X:
                    bf:93:74:5a:7d:75:a1:af:68:3d:52:ec:0b:8f:66:
                    09:a7:40:bb:94:93:7c:f8:a0:ad:03:be:e2:ec:51:
                    11:7c
                Y:
                    52:29:b1:c5:a1:c2:0b:c8:97:c3:da:65:1b:36:2a:
                    d9:4f:2d:2f:48:f9:b3:c5:8e:f5:4b:9d:40:35:7e:
                    a4:5e
                Curve: P-256
        X509v3 extensions:
            X509v3 Key Usage: critical
                Digital Signature
            X509v3 Extended Key Usage:
                Server Authentication, Client Authentication
            X509v3 Subject Key Identifier:
                3C:E8:3A:68:B4:4A:C2:63:E9:7E:6A:0C:8A:29:F7:2A:CF:38:94:D2
            X509v3 Authority Key Identifier:
                keyid:83:CC:31:DD:68:E3:02:76:25:E1:50:B9:FD:15:59:81:29:6C:EB:96
            X509v3 Subject Alternative Name:
                DNS:localhost
            X509v3 Step Provisioner:
                Type: ACME
                Name: acme
    Signature Algorithm: ECDSA-SHA256
         30:44:02:20:20:95:51:3c:14:72:1e:9c:14:7f:3b:8a:4f:5b:
         e9:4a:24:a1:a4:b1:74:87:dc:20:81:2c:68:b6:d2:5b:d2:b3:
         02:20:7c:19:f0:df:8f:c0:ef:f6:d0:9c:01:69:d0:4a:ca:e1:
         39:d7:67:e7:71:4f:9a:2b:25:2a:79:a6:87:e6:f9:ec
总结⌗
到这里基于 Smallstep 的 PKI 就已经搭建完成了,在本章中,我们只是说明了如何手动来生成证书,如果只是手动生成证书的话,那么 Smallstep 相较于文章开头提到的一些 CA CLI 工具来说,复杂了很多!
但是 Smallstep 的核心是其内置 CA 服务和对 ACME 协议的支持!
接下来还有很多需要和现有工具进行融合的地方,例如 Traefik 如何利用 Smallstep 实现自动申请 HTTPS 证书……
I hope this is helpful, Happy hacking…