x86 架构计算机如何启动的

共识⌗
不只是程序,整个计算机系统(包括软硬件)也是一个状态机。
软硬件的约定⌗
CPU 加电后会被重置到某个状态,这个操作被称为 RESET,根据 Intel 的开发者文档中的描述,x86 系列处理器在加电后寄存器会被设置为固定的值,此时处理器进入 Real-Address(实地址) 模式,具体可以对照下面 Intel 的开发者手册:
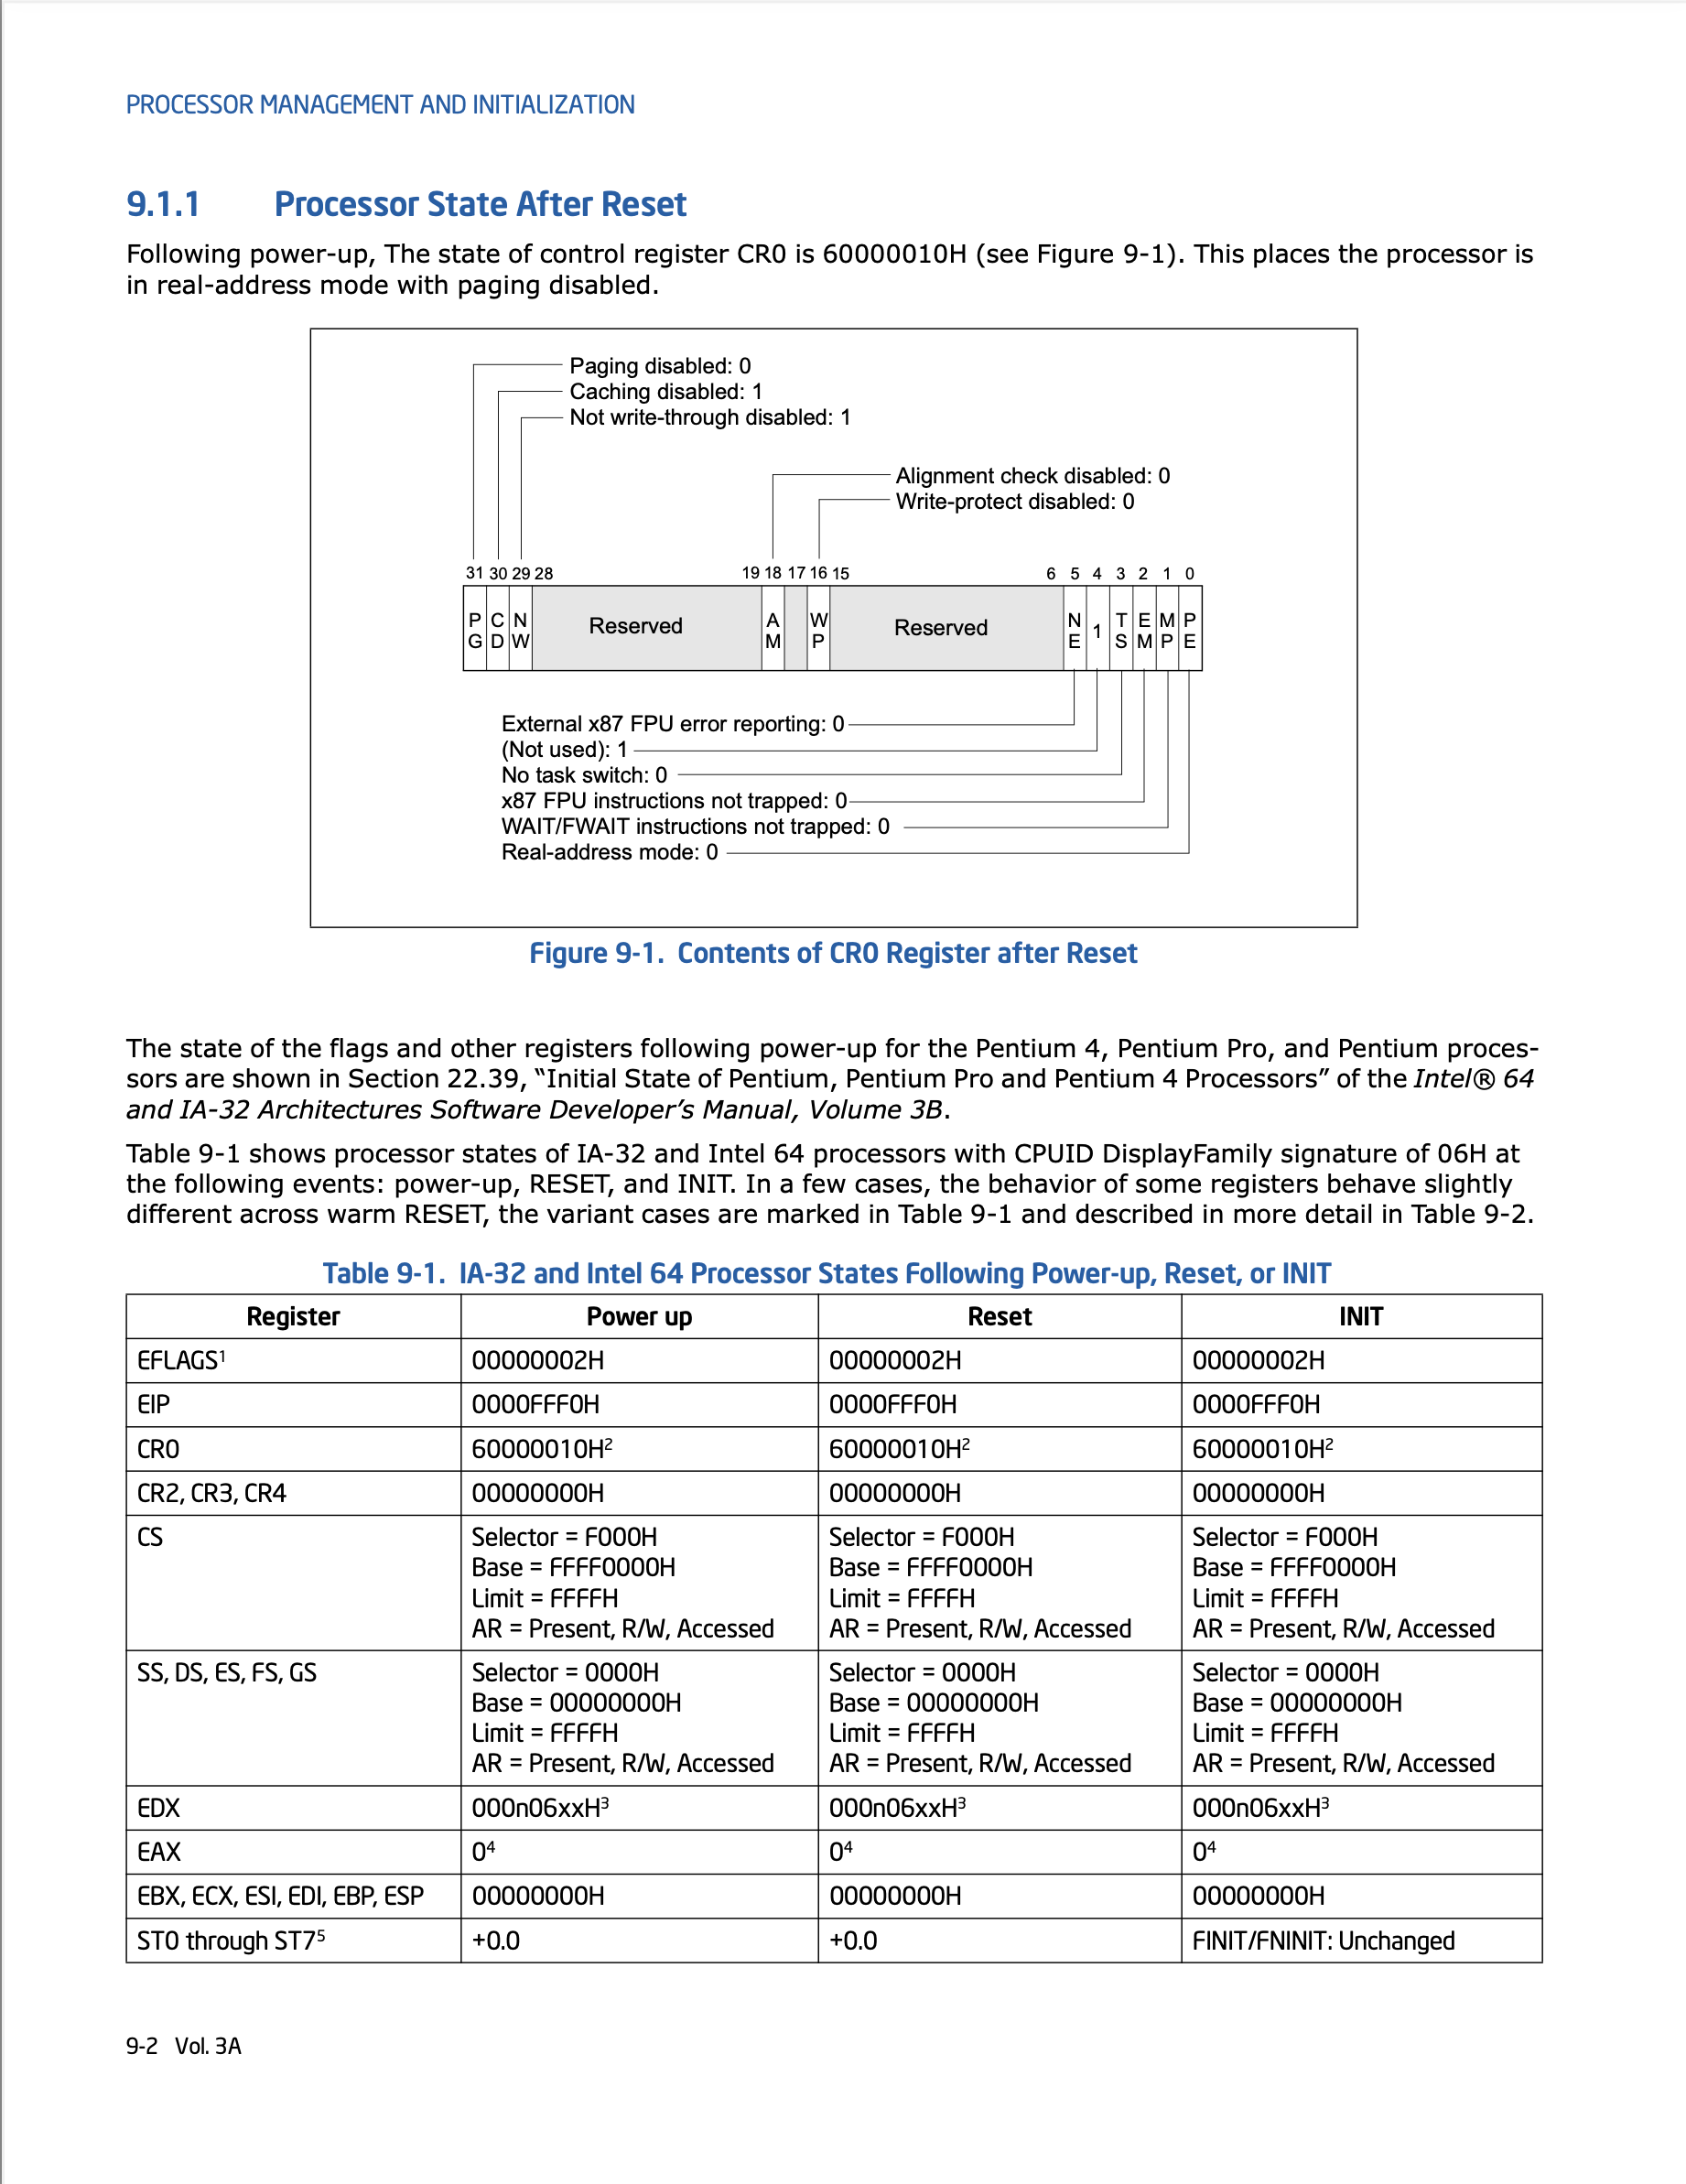
CPU 重置后部分寄存器如下:
- EIP 对应的值为
0x0000fff0; - CR0 的值为
0x60000010,表示进入 16 bit 模式; - EFLAGS 的值为
0x00000002,表示禁用终端模式。
执行主板厂商固件⌗
CPU 会从 PC 也就是(CS:IP)指针处获取指令、译码、然后再执行,而 0x0000fff0 通常是一条向 Firmware 跳转的 JMP 指令。Firmware 通常是由主板厂商开发的,会写入主板的 ROM 中的,这部分软件其实就是主板或主板上外插设备的软件抽象,支持系统管理程序运行。
Firmware 目前为止有两种:早些年是 Legacy BIOS,现在大多是 UEFI。
Firmware 还必须同一种机制,将用户数据载入内存,例如 Legacy BIOS 必须把第一个可引导设备的第一个扇区(MBR)加载到物理内存的 0x7c00 位置。
Firmware 是如何判断是否为可引导扇区呢?其实就是判断这 512 Bytes 的最后两个 Bytes 是否是 0x55 和 0xAA,如果是,则表明该设备可用于启动。
例如我手头上的一个 VMware ESXi 的安装盘,其中 efiboot.img 便是用于引导的镜像,通过如下命令可以看到:
cat efiboot.img | head -c 512 | hexdump
0000000 3ceb 6d90 646b 736f 7366 0000 0102 0001
0000010 0002 0002 f808 0006 0020 0040 0000 0000
0000020 0000 0000 0000 7a29 043f 5563 4645 6249
0000030 6f6f 2074 2020 4146 3154 2032 2020 1f0e
0000040 5bbe ac7c c022 0b74 b456 bb0e 0007 10cd
0000050 eb5e 32f0 cde4 cd16 eb19 54fe 6968 2073
0000060 7369 6e20 746f 6120 6220 6f6f 6174 6c62
0000070 2065 6964 6b73 202e 5020 656c 7361 2065
0000080 6e69 6573 7472 6120 6220 6f6f 6174 6c62
0000090 2065 6c66 706f 7970 6120 646e 0a0d 7270
00000a0 7365 2073 6e61 2079 656b 2079 6f74 7420
00000b0 7972 6120 6167 6e69 2e20 2e2e 0d20 000a
00000c0 0000 0000 0000 0000 0000 0000 0000 0000
*
00001f0 0000 0000 0000 0000 0000 0000 0000 aa55
0000200
也就是上面倒数第二行的最后两个 Bytes 的值为 aa55。
如果要看这部分的代码可以使用 QEMU 来模拟,并且用 GDB 在 0x7c00 处打上 Watch Point。QEMU 使用的是 SeaBIOS,也可以直接查看 SeaBIOS 的源码。
当年 CIH 病毒,就是利用了 Intel 用于更新 ROM 的功能,开启了 ROM 的可写权限,修改了 ROM 中的 Firmware 代码,导致 CPU 进入死循环无法按预期加载系统。
Bootloader⌗
Bootloader 是启动加载器,用于加载操作系统内核到物理内存中,并将 PC 指向操作系统内核的某个 PC。
Kernel⌗
在 Kernel 中首先执行的是 kernel_init(void *unused),并尝试在在如下目录中启动第一个程序:
- /sbin/init
- /etc/init
- /bin/init
- /bin/sh
现在的系统中,大多使用 systemd 作为第一个进程,来管理其他子进程,所以可以可以看到 /sbin/init 是 /lib/systemd/systemd 的软连。
ls -la /sbin/init
lrwxrwxrwx 1 root root 20 Jun 27 18:28 /sbin/init -> /lib/systemd/systemd
可以在 Linux 的源代码中看到:
static int __ref kernel_init(void *unused)
{
	// Other code ....

	if (!try_to_run_init_process("/sbin/init") ||
	    !try_to_run_init_process("/etc/init") ||
	    !try_to_run_init_process("/bin/init") ||
	    !try_to_run_init_process("/bin/sh"))
		return 0;

	panic("No working init found.  Try passing init= option to kernel. "
	      "See Linux Documentation/admin-guide/init.rst for guidance.");
}
到此,操作系统就被真正的启动了,可以使用 pstree 命令查看当前系统的进程树结构。
$ pstree
systemd─┬─ModemManager───2*[{ModemManager}]
        ├─VGAuthService
        ├─agetty
        ├─cron
        ├─dbus-daemon
        ├─irqbalance───{irqbalance}
        ├─multipathd───6*[{multipathd}]
        ├─networkd-dispat
        ├─packagekitd───2*[{packagekitd}]
        ├─polkitd───2*[{polkitd}]
        ├─rsyslogd───3*[{rsyslogd}]
        ├─snapd───10*[{snapd}]
        ├─sshd───sshd───sshd───bash───pstree
        ├─systemd───(sd-pam)
        ├─systemd-journal
        ├─systemd-logind
        ├─systemd-network
        ├─systemd-resolve
        ├─systemd-timesyn───{systemd-timesyn}
        ├─systemd-udevd
        ├─udisksd───4*[{udisksd}]
        ├─unattended-upgr───{unattended-upgr}
        └─vmtoolsd───2*[{vmtoolsd}]
I hope this is helpful, Happy hacking…